- Someone who wants to do something with Raspberry Pi
- Someone who wants to do something with Python or machine learning
- Someone who wants to make a face tracking camera
I tried to build a face tracking system based on Raspberry Pi and Python, machine learning technology.
I’m going to share to you how to make the face tracking camera today.
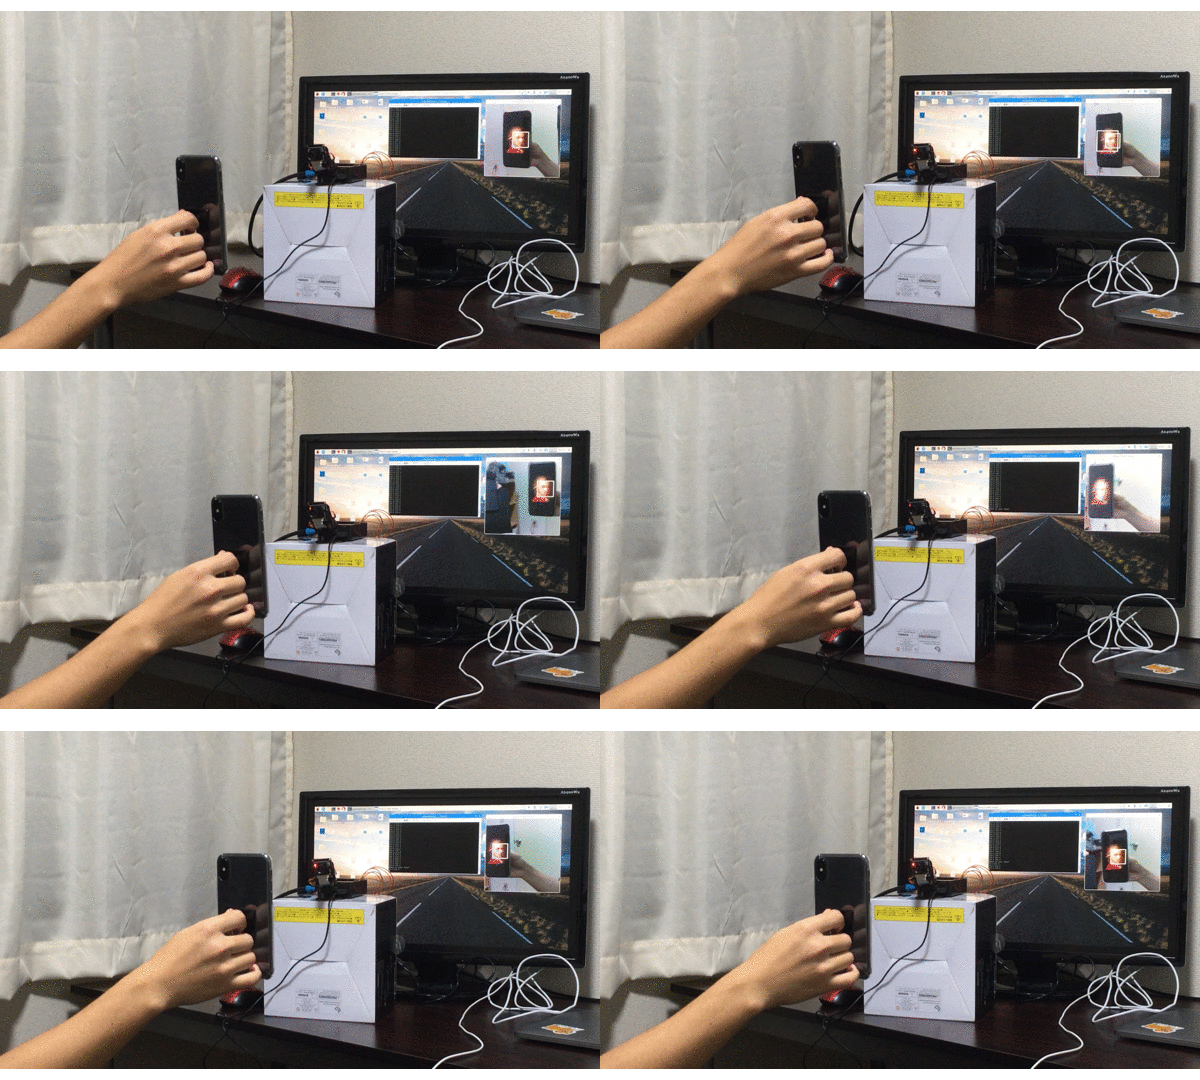
If you want to see more detail, please see the YouTube video for about 20 seconds.
You can see that the camera attached to the Raspberry Pi is chasing Mozart’s photo.
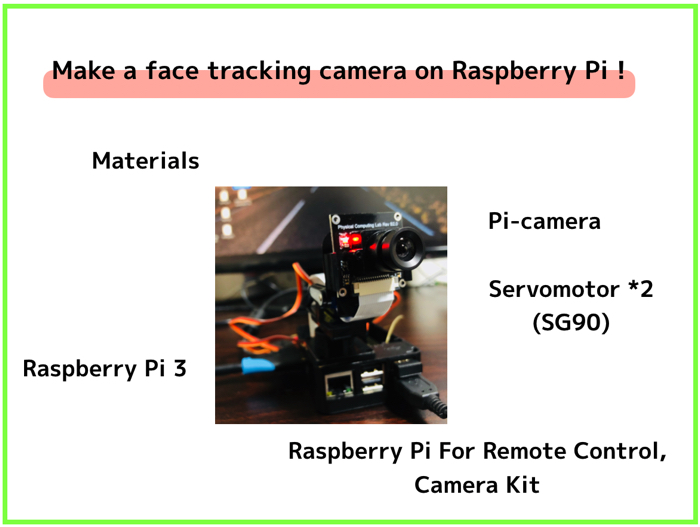
The camera has a servomotor which moves horizontally and vertically.
It is directed towards the face of Mozart.
I will write out the framework of this system, including Python Code, used materials, and so on…
Python Code
This system works with Python code.
I mainly referred to this web page.
(Reference:Raspberry Pi3 とカメラモジュールで顔追跡カメラを作る (Making face tracking camera with Raspberry Pi and camera module))
I further improved the code.
1 2 3 4 5 6 7 8 9 10 11 12 13 14 15 16 17 18 19 20 21 22 23 24 25 26 27 28 29 30 31 32 33 34 35 36 37 38 39 40 41 42 43 44 45 46 47 48 49 50 51 52 53 54 55 56 57 58 59 60 61 62 63 64 65 66 67 68 69 70 71 72 73 74 75 76 77 78 79 80 81 82 83 84 85 86 87 88 89 90 91 92 93 94 95 96 97 | # -*- coding: UTF-8 -*- import cv2 from picamera import PiCamera import io import numpy as np import os import time import pigpio pi = pigpio.pi() def move(x_move, y_move): pi.set_servo_pulsewidth(4, x_move) pi.set_servo_pulsewidth(17, y_move) #Servomotor movable range of X, Y X_MAX = 2500 X_MIN = 500 X_HOME = 1500 #Horizontal Y_MAX = 2500 Y_MIN = 1500 Y_HOME =2100 #Vertical #Initialization of camera position move(X_HOME, Y_HOME) #Path of the library for face detection cascade_path = "/home/pi/opencv-3.1.0/data/haarcascades/haarcascade_frontalface_alt.xml" cascade = cv2.CascadeClassifier(cascade_path) stream = io.BytesIO() # camera=PiCamera() W = 500 H = 500 camera.resolution = (W, H) color = (255, 255, 255) #white #Assign the initial position to the current position now_degree_x, now_degree_y, move_degree_x, move_degree_y = X_HOME, Y_HOME, 0, 0 while(True): camera.capture(stream, format='jpeg') # data = np.fromstring(stream.getvalue(), dtype=np.uint8) # image = cv2.imdecode(data, 1) # frame = image facerect = cascade.detectMultiScale(frame, scaleFactor=1.2, minNeighbors=2, minSize=(10, 10)) if len(facerect) > 0: for rect in facerect: img_x = rect[0]+rect[2]/2 img_y = rect[1]+rect[3]/2 print(img_x, img_y) #Calculation the between the face and the camera position.(250 at (W,H)/2) move_degree_x = now_degree_x + (-img_x+250)*0.8 move_degree_y = now_degree_y + (img_y-250)*0.5 #Move the camera only within the movable range of the motor #if ((move_degree_x >= 500 and move_degree_x <= 2500) and (move_degree_y >= 500 and move_degree_y <= 2500)): if move_degree_x >= X_MIN: if move_degree_x <= X_MAX: if move_degree_y >= Y_MIN: if move_degree_y <= Y_MAX: #Move the camera towards the face move(move_degree_x, move_degree_y) now_degree_x = move_degree_x now_degree_y = move_degree_y else: print("Can't see the bottom") else: print("Can't see the top") else: print("Can't see the right") else: print("Can't see the left") #A circle describes the face recognition center point cv2.circle(frame, (int(img_x), int(img_y)), 10, color, -1) #The face recognition part is enclosed in a rectangle cv2.rectangle(frame, tuple(rect[0:2]),tuple(rect[0:2] + rect[2:4]), color, thickness=3) else: print("Where is your face?") cv2.imshow("Show FLAME Image", frame) k = cv2.waitKey(1) if k == ord('q'): break stream.seek(0) cv2.destroyAllWindows() |
I thought that some people might be interested in the code and write it first.
I’m going to introduce “The framework of the system” with Python Code.
System structure
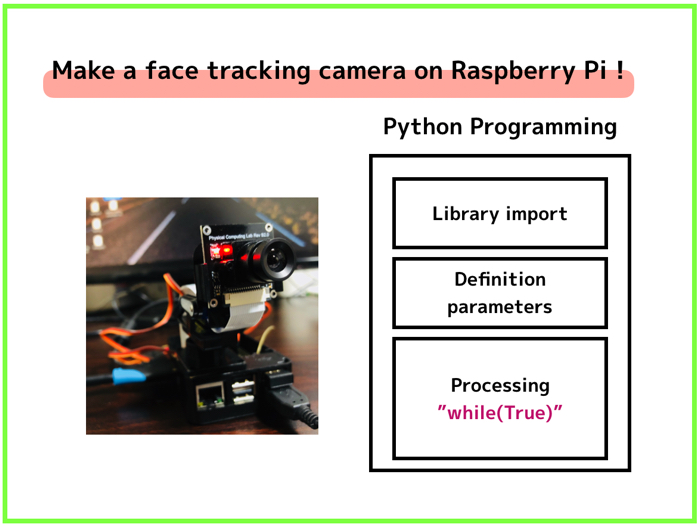
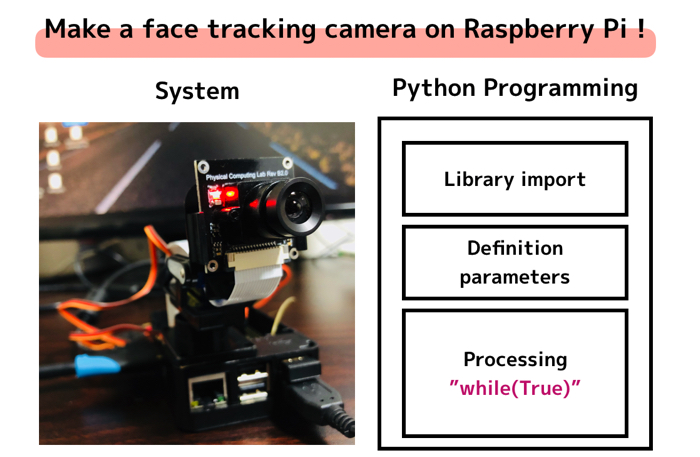
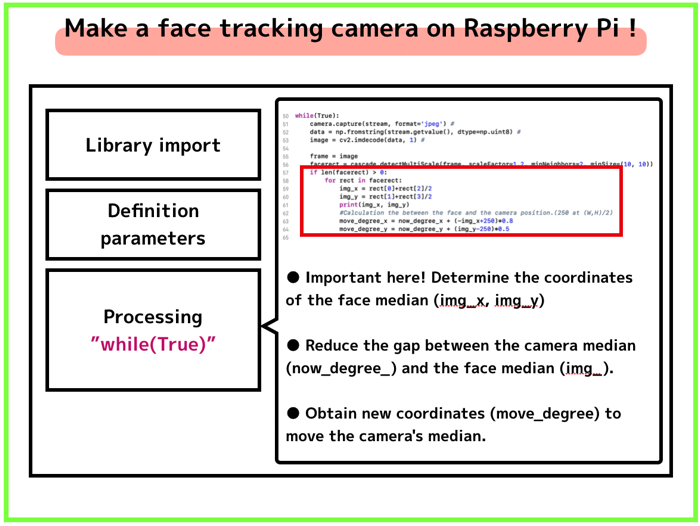
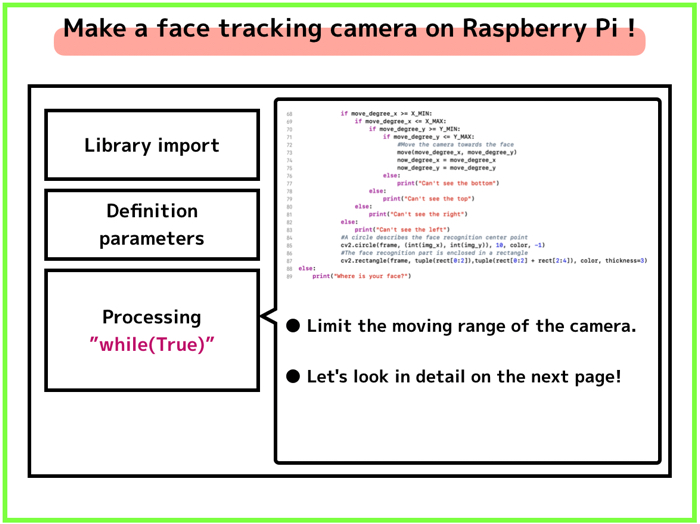
The program is divided into three parts.
as illustration above,
- Library import
- Definition of parameters and various characters, initialization, etc.
- Processing part (from “while(True)”)
I will explain important things in the system.
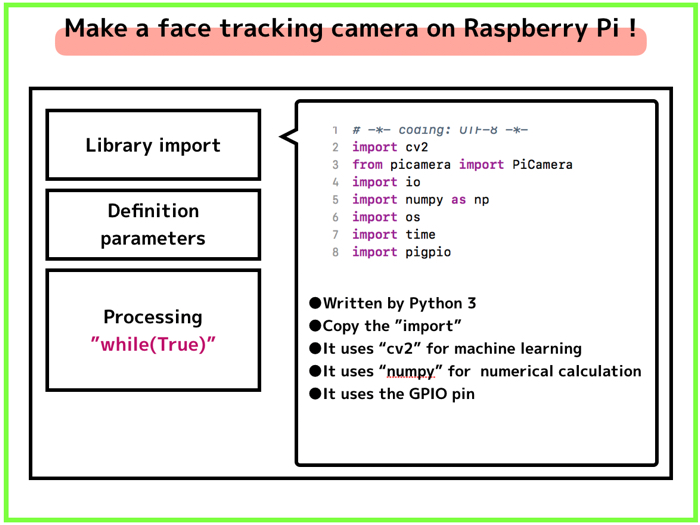
Library import
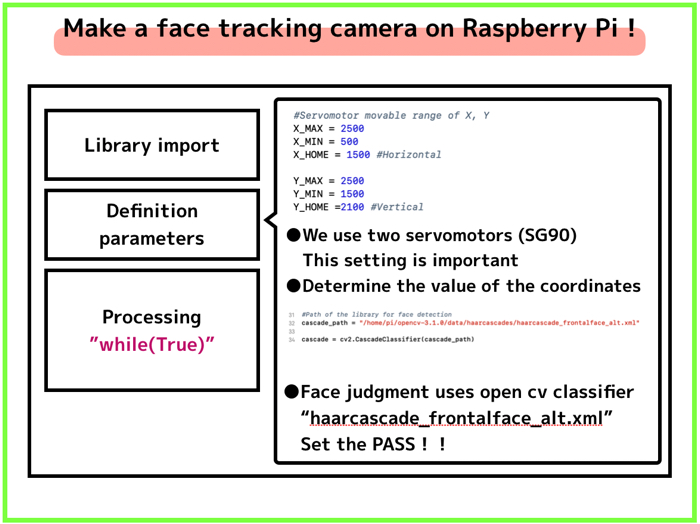
Definition of parameters and various characters, initialization, etc.
Installing of 2-axis servo motors!
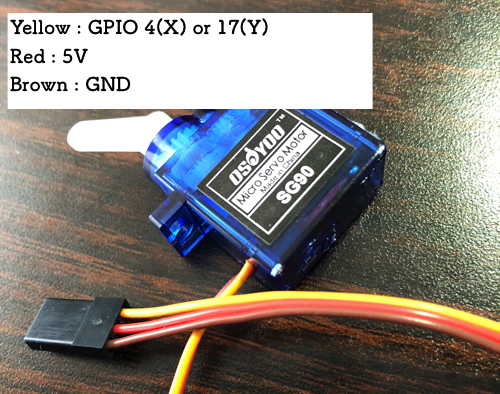
In this system, two servomotors (2 SG90s) are used.
There are three lines per servomotors.
Each line is below.
- Yellow : GPIO number 4 (X) and 17 (Y)
- Red : To 5V power supply
- Brown : To GND
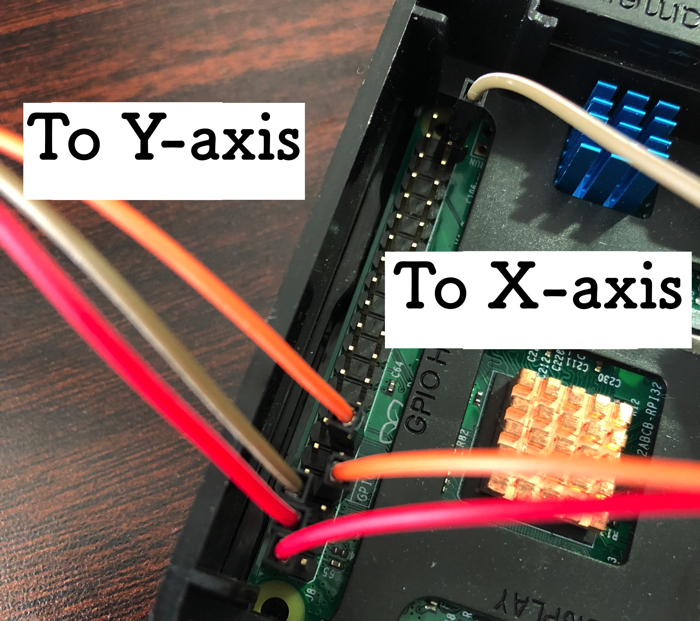
Power and ground can be anywhere.
It is ok if you connect as shown below.
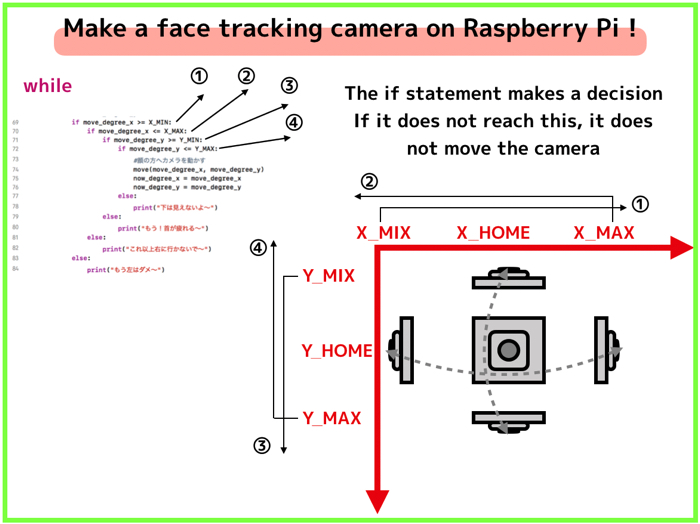
Determine the movable range of X-axis and Y-axis on the program
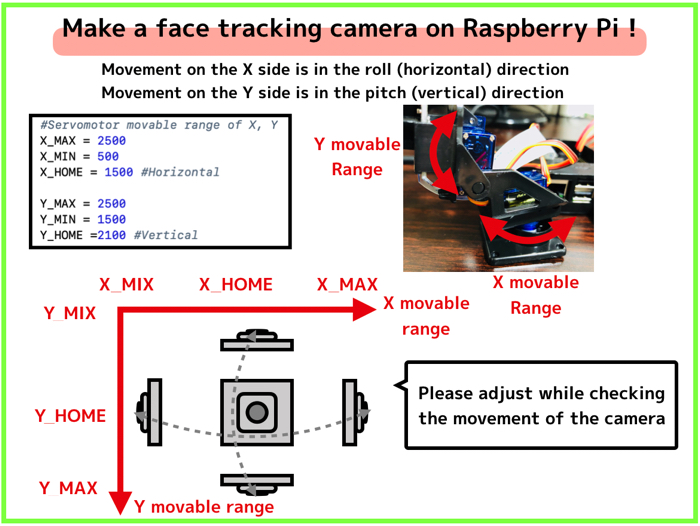
Set this movable range empirically while actually moving the servomotor !
(It’s safer!!)
So, please change X_MAX and Y_MAX directly at the final adjustment stage.
After that, it works by posting the program.
Although the product link is attached, the camera kit here is a little substandard.
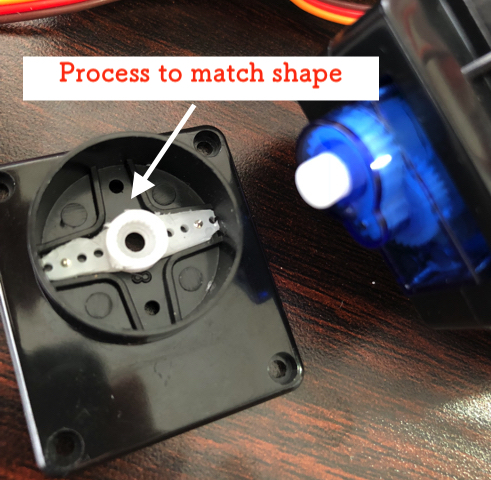
In addition, there is no connector part linking the base stage and the servomotor! ! Lol
I was patient because the price was cheap.
I made it by processing the connecting part.
I also attach a camera module link, but if you have a webcam, that will do.
Important point
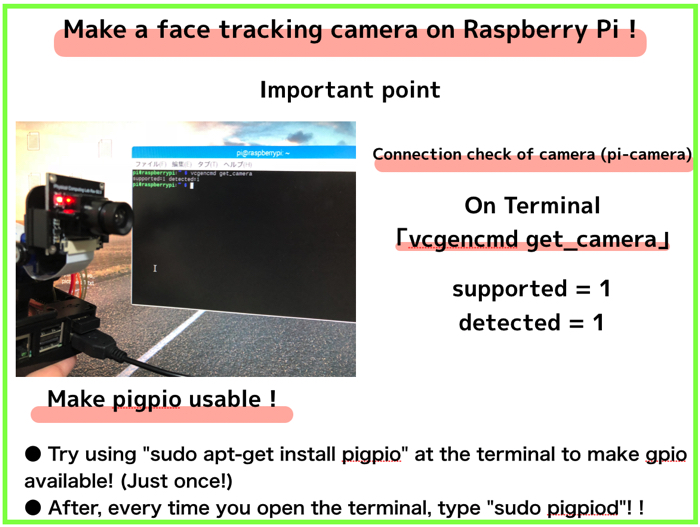
Please keep in mind that the connection confirmation of the camera and the GPIO pin can be used.
On each terminal,
- vcgencmd get_camera
- sudo pigpiod
Just press enter!
There’s Endless possibility with Raspberry Pi!!!!
You can do anything with Raspberry Pi!
The face tracking camera was also fairly easy to make.
Why not to make some systems using Raspberry Pi for everyone.


